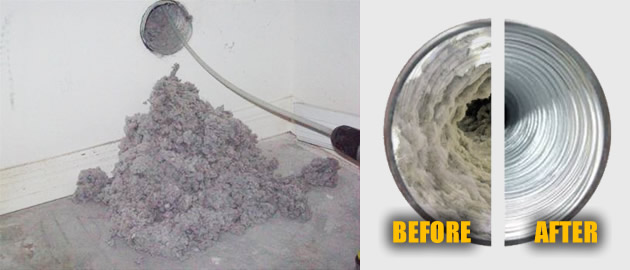
Left neglected, a burst washing-machine tube can splash numerous gallons of water a hr. Furthermore, a dryer can appear in flame if lint is allowed to develop inside the device or its ducts. In 1999 (one of the most recent data available), dryers triggered 14,600 fires, 20 fatalities, as well as $86.8 million in residential or commercial property damage in the United States.
Also Read: www.appliancesconnection.com
Protecting against such mishaps is as easy as changing a washer's old rubber tubes, ideally with steel-jacketed ones that can't divide open. Or throwing out the dryer's flimsy and combustible plastic duct as well as putting a metal one in its place. (Routine lint-trap cleansing, while essential, will not maintain lint from accumulating in the duct.).
As soon as you've made those 2 major upgrades, as revealed on the complying with pages, enter the practice of checking hoses as well as cleaning air ducts every 6 months or so. Pipes must be changed every five years; tag them with the day you installed them so you won't fail to remember. Your appliances will certainly last much longer, run far better, as well as make use of less power. Right Here, Richie Isaacson of Affordable Device, in Randolph, Massachusetts, demonstrates how to maintain a washer and dryer running safely and successfully.
See More: blog.designerappliances.com
Eliminate the Old Hoses
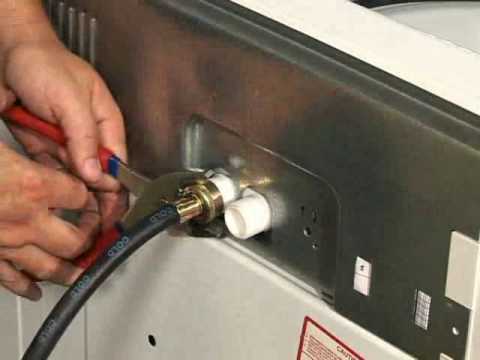
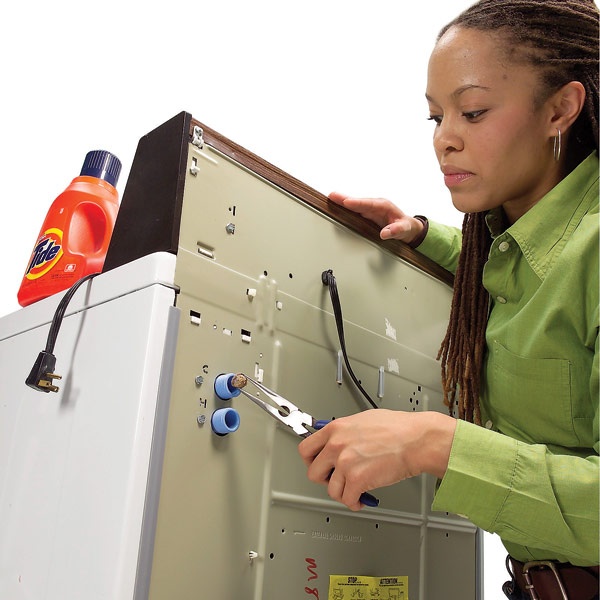
Switch off the chilly and warm water valves, unplug the washer's power cable, as well as remove the drainpipe tube from the drainpipe. (If the drain tube has cracks, replace it with the same type of hose.) Place a towel or tarp under the supply hoses to catch any type of water, after that eliminate the tubes with a pair of grooved-joint flexible pliers.
Tidy the Filter Screens
Particles and also sediment will reduce the circulation of water right into the machine. Inspect the filters, and clean out any type of buildup with a bristle brush.
Install New, Braided Hoses
.jpg?timestamp=1530163652373)
Use your fingers to screw the tube fittings into the equipment's threaded nipples, after that tighten up carefully with pliers. See to it the hose pipe is long enough to enable you to move the device if required; 60 inches is convenient for many setups.
Attach the Water
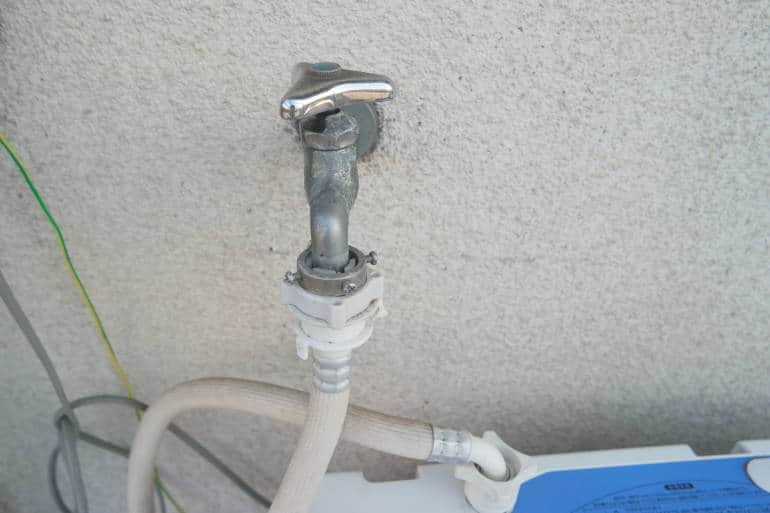
Attach the other ends of the braided hose pipes to the water-supply bibs as in Step 3. Make certain to match the hot hose pipe with the hot-water supply and the cool with the cool supply. Open the valves and also examine for leakages. Reconnect the drainpipe hose to the drain. If you're installing a drip pan (Step 5), reconnect the drainpipe hose after the frying pan is in location.
Add a Drip Pan
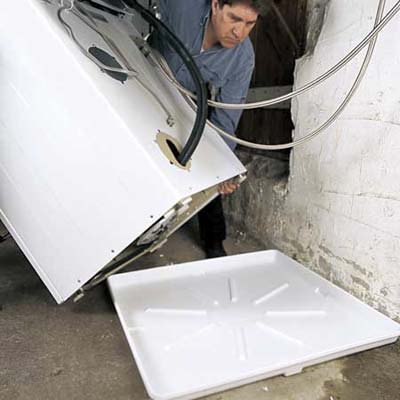
Look in plumbing-supply shops or house centers for a frying pan with a drainpipe so any type of water that accumulates can be drawn away to a flooring drain. Each time you run a lots, make certain no water has leaked out.
Tidy the Dust Catch
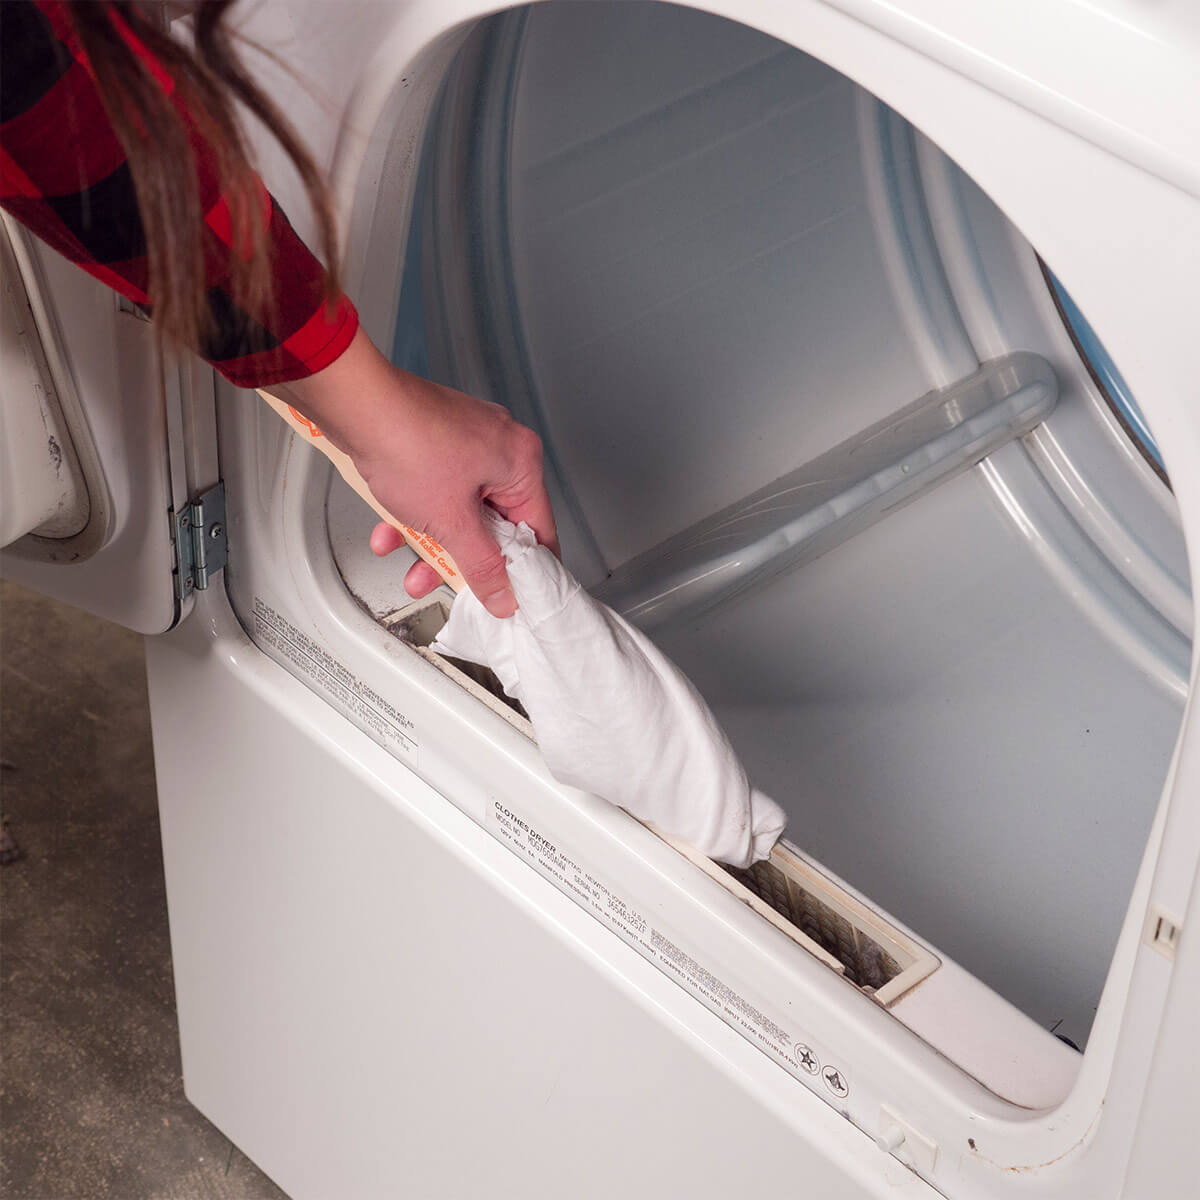
Draw out the lint screen as well as press a snorkel brush straight down right into the trap. Beam a flashlight down the catch to make sure it's tidy.
Tidy the Ductwork

Separate the ductwork from the dryer exhaust and also from the exterior air vent. If the air duct is ribbed or plastic metal, toss it out. If the duct is smooth-wall metal, as shown here, take it outdoors as well as clean all the get rid of a round dryer-vent brush.
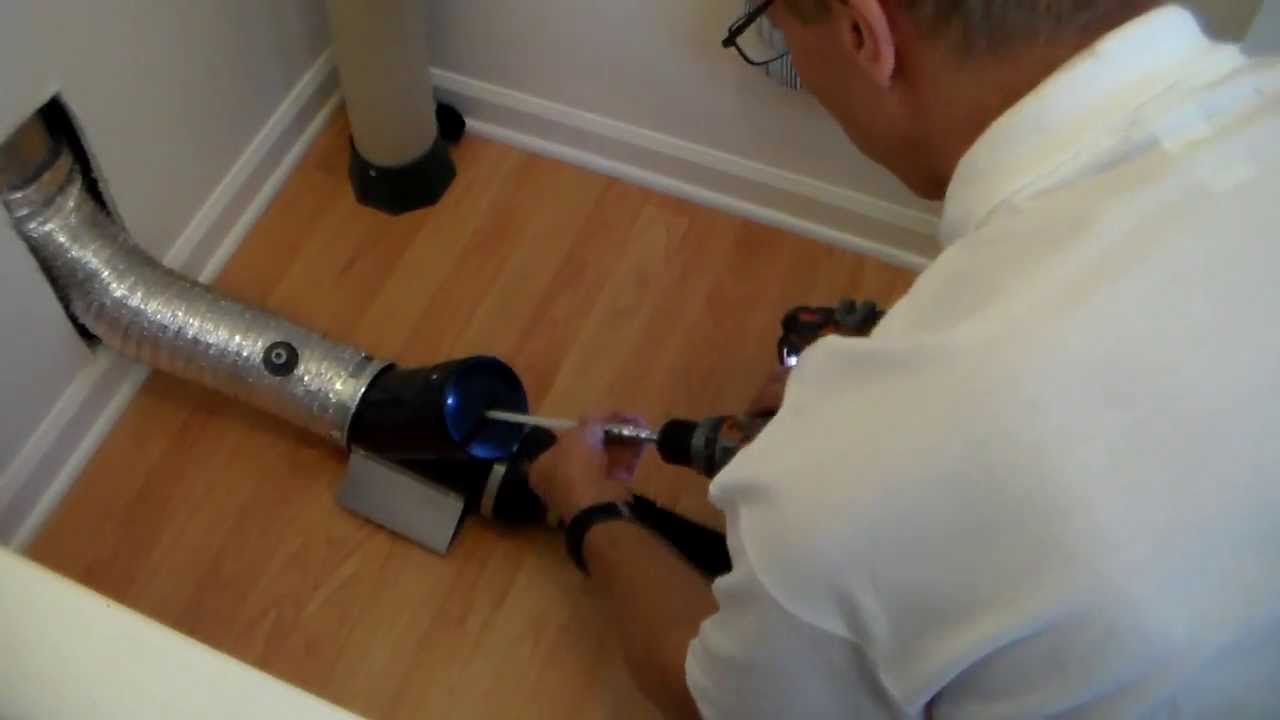
Tidy the Outside Vent
Functioning from within, rotate the duct brush a few inches right into the duct leading outside, after that draw it back and clean off the bristles. If need be, eliminate the hood, tidy it out, and also after that placed it back.
Reattach the Duct
Reconstruct the steel ductwork as well as seal the joints with light weight aluminum tape. (Don't connect the sections with screws, which grab dust.) Completions of the ductwork must fit comfortably into the dryer's exhaust and vent hood; no tape or hose clamps needed.